Day 3 of the Swoon Eloise Wallet Sewalong.
Today we will finish the trifold compartment and attach the main compartment zipper.
Today we will finish the trifold compartment and attach the main compartment zipper.
Take the stripe panel. Fold each long end under 1/2".


Now we want to find the center of the stripe.
Fold the stripe in half, matching long ends.

Take the trifold exterior piece, fold in half, matching long ends.

Mark center.

Match the centers. Pin stripe on.

Top stitch down each long end.
If you have a walking foot, it's helpful to use that here.
If you have a walking foot, it's helpful to use that here.

Let's put the female snap on.
Find the center of the strip.
Measure up 2.25". Mark.

As before, center the magnetic backing circle over the 2.25" mark.

Cut the two slits.

On the right side of the fabric, put the female legs into the slits.
On the wrong side of the fabric, slide the backing on and overlap the legs.

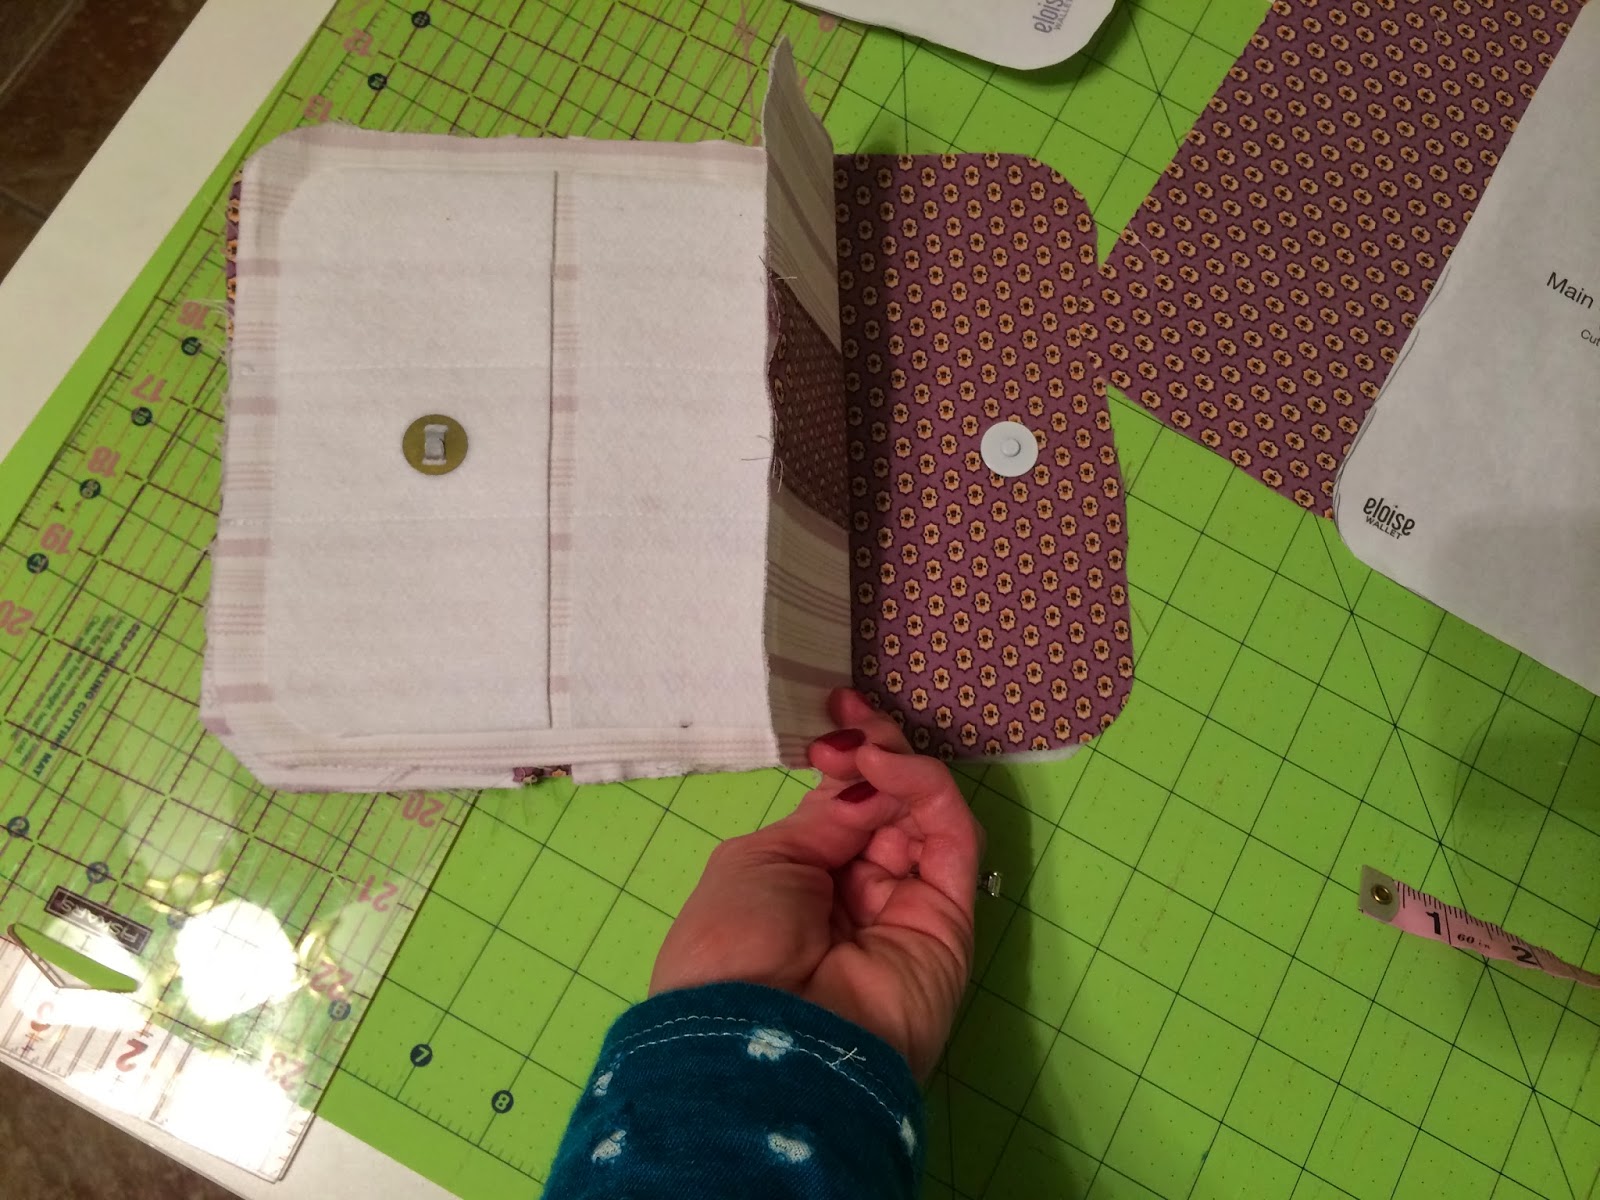
Right sides together, put magnetic ends on opposite sides, pin the interior and exterior pieces together..


Sew together at 1/2" SA. You will be following along the edge of the Peltex, but not through the Peltex. Leave a 5" opening along a long side.


Cut your seam allowance except where your opening is.
Mine is on the short side. It's much easier if the opening is on the long side.

Turn it right side out.

Push the opening seam allowance inside, aligning it nicely.
Pin in place.
Top stitch around entire trifold.
I prefer to hand stitch the opening closed instead of top stitching.
Purely my preference. Makes no difference either way. Which ever look you like.

Here are photos as well.
Thread your needle and knot the end.

On the left side of the opening, slide your needle under 2-3 machine stitches (right to left).
*If you are left handed, start on the right side*

Pull your needle through. Your thread knot will get caught in the machine stitch.
You can see a little thread tail hanging out.

Push the tails into the opening.
*I have my thread pulled out of the way*

Flip your work around. Now we are right to left.
*left to right if you're left handed*

Your thread will be coming out between the two fabrics.
Imagine vertical lines along your work. RIGHT above where your thread exits the work, insert your needle in the top fabric. Look closely at the picture below.

Pick up a small stitch along the top fabric, no more than 1/8".
The smaller the stitches, the nicer it will look.
Pull the stitch tight, but not so tight that it puckers.

Still imagining those vertical lines?
Move down the lower fabric right below where your thread comes out from the top fabric.
PS-I am actually stitching along my machine stitches right now. Doing this will ensure a smooth transition to the actual opening and keep my hand stitches from coming out.

Pick up your small stitch.

Move back up to the top, following that imaginary vertical line.
Pick up another stitch. Sew across the entire top, making a stitch or two into your machine stitches on the left side.

See the Closure Video for finishing your hand stitching.
If needed, pull on each end of the closure to straighten out any puckering.

Remember the Peltex is double sided.
Let's adhere the the Peltex to the other side now.
Press the trifold well. Check to make sure everything is stuck together.

Trifold complete!

The pleat still makes me sad.


Second part to today.
Attaching the zipper to the main compartment.
Grab your zipper and the main compartment exterior.
Video on attaching the zipper to the main compartment exterior fabric
Video on attaching the zipper to the main compartment exterior fabric

Fold the main compartment in half, along the thin Peltex strip.


Mark the center on the top and bottom.
It SHOULD me in the middle of the thin Peltex strip.

The marks will be where your zipper starts and finishes.
With your zipper closed, make 3 marks along both sides of the teeth.
Open your zipper. Matching right sides, pin your zipper on.
I like to start at the bottom of the zipper, where your pull is.
Place the bottom/pull right at the edge of your fabric, centering at your mark.
One zipper side at a time, pin the zipper (zipper teeth are facing towards the center of the piece)
1/4" away from the raw edge. The zipper edge should be just before the Peltex. We will have a small seam allowance. On the curves, you can make tiny 1/8" clips to help the zipper curve nicely.
When you get to the other center mark, curve the end of your zipper off the fabric as the picture below.

To sew the zipper, start at the bottom where you zipper pull is. We want to sew the zipper on one side at a time, each side sewing in the same direction.

Start sewing where you zipper curves at your center mark.

Take the curves slow. You can see where I made 3-4 small snips. Press the zipper down with one finger as you sew. The zipper likes to bubble up on the curves.

When you get to the end, make a little mark were your zipper curved down and away from the fabric.
This is where you will stop sewing. Pull the zipper straight, sew until your mark.

Repeat for the other side of the zipper; once again starting at the bottom where the zipper pull is.

Oh yes, very nice.

Cut your zipper tails, leaving 2ish inches.

Test out your zipper.
Do NOT zip it up like a bat out of hell and rip the pull off the zipper because you cut the bottom stop off and then FREAK out because you've never had to put a pull back on track.
A sailor would cringe at the words I used when that happened.

Looks good! Tuck the zipper tails into the compartment.

That completes day 3. Only two more days to go!
No comments:
Post a Comment