 |
| Irregular Hem Line |
 |
| Straight Hem Line with Pockets |
Download the FREE Swoon Cardigan pattern. There is also a girl's version. Then go over to the Swoon Fan Page and give Alicia a high five for making awesome free patterns.
The Swoon Cardigan has a scarf neck, princess seams, and irregular hem line.
Materials list:
2 yards 60" wide knit fabric, add 1/2 yard for direction fabric (women's)
1 yard 60" wide knit fabric, add 1/2 yard for direction fabric (girl's)
Thread
ball point needle
walking foot (very helpful when sewing knits)
Materials list:
2 yards 60" wide knit fabric, add 1/2 yard for direction fabric (women's)
1 yard 60" wide knit fabric, add 1/2 yard for direction fabric (girl's)
Thread
ball point needle
walking foot (very helpful when sewing knits)
Print out your pattern. Pick the size that you normally wear. Some of the feedback has been that the larger sizes run small. My measurements are bust 34; waist 26. Size small fits me perfectly. If you feel you maybe in between sizes, then you can 'frankenpattern'. Meaning draw lines on your pattern pieces easing from one size to the next. For example. If your bust is XL but waist is SM (don't we all wish!), then starting at the bottom of the bust area on the pattern, draw an concave line from XL easing down to SM at the waist.

More feedback has been that the sleeves are too long. Measure your arm from shoulder to wrist (or where ever you want the sleeve to end) and compare length to pattern piece. Shorten if needed. Make sure to add 1/2" hem allowance on the bottom!
Knit tips:
If you are new to sewing knits, I recommend choosing a medium weight knit such as a double knit or sweater knit. I would not recommend using tissue knit, slub, single knit, or any other thin knit if you are knit sewing beginner. How to sew knit tips are below.
You could also use fleece to make this but you might need to size up as fleece isn't quite as stretchy.
Two versions are mixed in this tutorial. The first is the cardigan pattern as is. The second version is with a straight hem and with pockets. I HIGHLY recommend glancing through the entire tutorial to see how I jump from one to the other. I do this in in order of sewing. The two versions are mixed together.
Version 1 is written in black. Version two is written in red. If it applies to BOTH versions, instructions are written in blue.
Let's go! It's gonna get wild, so really read and think about it!
Cut or trace and cut your final size. I like tracing on Swedish tracing paper because it's really awesome stuff. I didn't do that here though....

How to make a straight hem. This is how the pattern pieces are sewn together.
Front panel and side panels are words side up. Turn the back panel upside down to see how it connects to the side panel.

The back piece is already straight. We'll leave it alone. Move on to the side panel.
The back panel connects to the side panel at the higher point. See below.
Though it seems wrong, because of the princess seams, the straight hem is the lower point. Draw a line from point to point on the side panel.

The front panel connects to the side panel at the lower point-which is the higher point on the front panel (right side of the pattern piece). Draw a line straight across to the left side of the front panel. I actually drew the line so the left side was 1/2" lower so it would drape well.
Fold the bottoms of the front and side panels up or you can cut them off if you're daring. Follow the same cutting directions as below. Below shows the regular pattern pieces, but the same cutting rules apply for both versions.

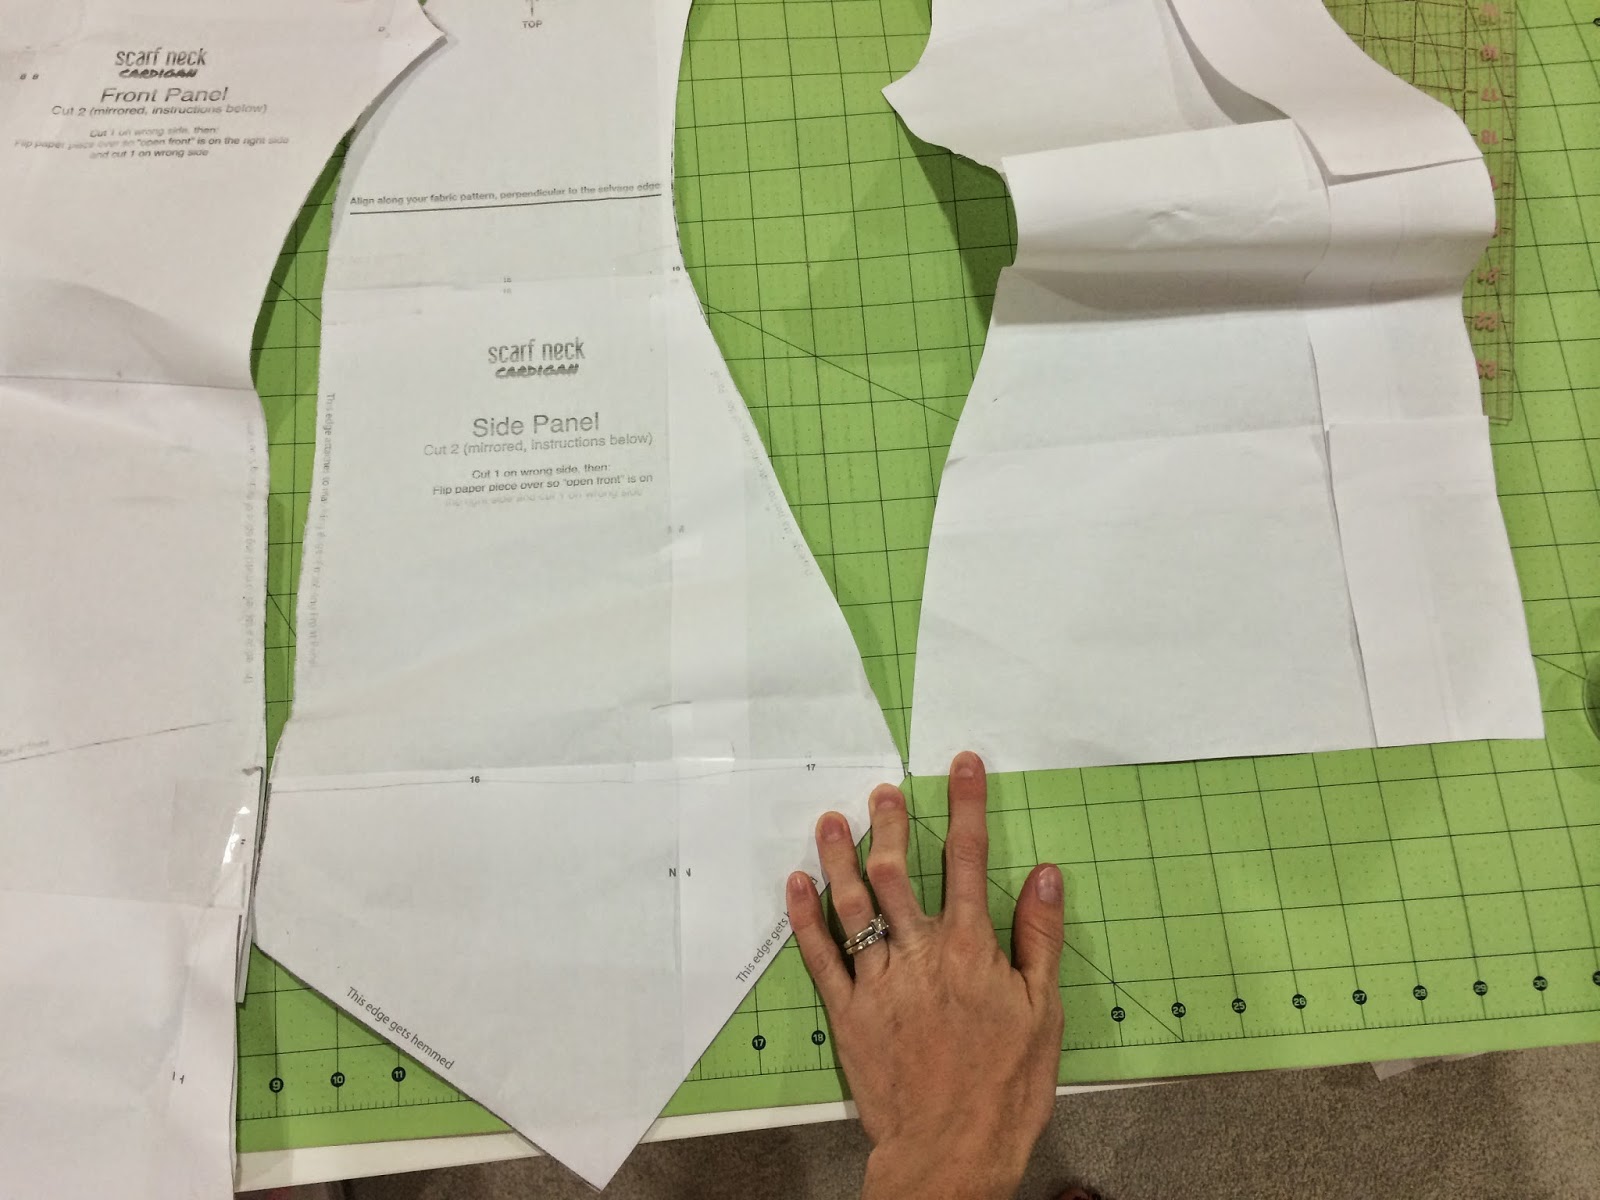
Let's cut. Double check you are cutting your pieces with the stretch going the width of your pattern piece.
This is the side panel. I don't recommend stripes for this. It was a pain in my arse to match up. Fold your fabric over in order cut two mirror images. I pin my pattern piece through both layers of knit and cut around he piece. This piece is NOT cut on the fold, so cut around the entire piece.

Cut out the back piece (1 on the fold) and the front panels (cut 2 mirror images)and cut 2 sleeve pieces (cut on the fold).

For both versions, you should have two sleeves, 2 mirror image front panels, 2 mirror image side panels, and 1 back piece on the fold.

Want Pockets? Download this free pattern piece (see notes on pattern piece and ignore that line running down the left side of the page), curtsey of your favorite blogger. We want 4 pocket pieces-two sets of mirror images. I folded the fabric so there for four layers and did one cut. Efficiency.


Seam allowance is 1/2" unless otherwise noted.
I pulled this diagram straight from the instructions. I think it's a nice visual of how the pieces are attached to each other.

There are several ways to sew the cardigan.
1. If you have a serger, I recommend using it and a double needle on the sewing machine.
2. No serger, that's ok. You can use a sewing machine and you have two options for sewing: a) french seams or b) regular seams. Knit does not fray, so the seams do not have to be finished. I'll explain more about these methods below.
Whatever method you choose, change out the needles for ball point. This is MANDATORY-even in your serger. Suck it up buttercup; it doesn't take long to re-thread your machine.
I also highly recommend using a walking foot to sew knits with your sewing machine.

When sewing a new fabric on my serger, I always test it out and adjust each tension dial if needed.
This was the first attempt with 4s straight across the tension settings. My knit is on the thinner side. The top looper is slightly too loose and when I pulled each end, it wasn't stretchy enough.

To fix these problems, I slightly bumped up the tension on the looper (green dial) and loosened the lower and middle straight stitches (yellow and red). Tested again and it was perfect. Keep testing your serger until you get a nice stitch for your fabric.

If you are using a sewing machine only, use a ball point needle and slightly longer stitch (3ish). Test out your tension and loosen if your seam isn't stretchy enough. You don't want to pop stitches. (Think Tommy Boy). You will use a single needle for seams and a double needle for hemming.
If using only a sewing machine: some people have luck with the "lightening bolt" or stretch stitch on their machine. I never liked this. I have the best luck with a long (3) and a narrow (.5) zig zag stitch.
Sew like this for all of your regular seams. TEST IT FIRST! Adjust tension if needed.
If you want to do french seams. Use this same stitch but put the fabrics WRONG sides together first, sew with 1/4" seam allowance. Press the seam to one side, fold the fabrics right sides together and stitch again with 1/4" seam allowance making sure to catch the original seam allowance. Voila!

Sewing without pockets: Take one front panel and the corresponding side panel. The corresponding side panel will have the matching curve as below.

Put pieces right sides together and pin along the side seam. This is a princess seam, so you will need to manipulate the curve. Pin well. Sew or serge the side seam. Repeat for other front and side panels.

Pockets!

Serge around the curved edge of all 4 pocket pieces.
If you don't have a serger you can either leave the pockets as is (knit will not fray) or you can do a wide & short zig zag stitch along the curve.

I pinned the pocket where the bottom of the pocket curve was 1.5" above the bottom hem line of the front panel.

If you're unsure about where to place the pocket. Hold up the pattern piece to yourself and mark where your hand naturally falls into a pocket.

If using a serger, serge from the top of the side seam down to the bottom hem line with 1/4" SA.
If using a sewing machine, just sew along the pocket with 1/4" seam allowance.
Press seam towards pocket.
Repeat for the other front panel and corresponding pocket.

Repeat for the side panels. The pocket will be sewn on the convex curve.
Use the same measurement as before on where the bottom of the pocket curve is in relation to the bottom hem line. Mine was 1.5"above.
Serge/sew the pockets to the side panels like you did with the front panels. Remember 1/4" SA! Press seam towards pocket.

Lay both panels out right sides together, lining up pocket and seams. The top of the side panel will curve away. Match the edges and pin this area together well.

Using a 1/2" SA, sew the side seam. When you get to the pocket, continue past the pocket 1/'2", pivot towards pocket, sew around pocket. When you get back to the panels, sew 1/2" into the panels, pivot and finish sewing the seam. Repeat for other front panel and side panel.

You've got pockets!

Beautiful!

Beautiful!

This is both versions! Put your combined panels right sides together.

Sew or serge the top diagonal line. This creates the scarf.

Unfold. It's time to sew the back panel on.
You can really do this in any order you'd like but this is how I did mine.
First, I sewed one back side to one panel side, then turned 90 degrees, the top of the back panel neck and shoulders line up with the complete neck at #2, then turned another 90 degrees to do the other side panel and back panel side.

Right sides together, line up one side panel edge with the back panel. We are only sewing the curve marked. Do NOT sew the top curve, that's where the sleeve goes!
1/2" seam allowance for the remainder of the tutorial.
If you have pockets, pin them out of the way!


The top of your front panels looks like double Ls. The entire back panel top will match up here.
Turn the back panel 90 degrees. Right sides together, match up the top of the back panel (the shoulders and neckline) with the double Ls of the front panels. Sew or serger together. Go slow with the angles!

Unfold. Make sure your sleeve hole is still open!

Finally, fold the last back panel side seam to match up with the other side panel seam. Right sides together, sew or serge the last seam.

If you are serging and have all of those long serger tails hanging every where. This is my favorite method for finishing.
Take a tapestry needle and slide it into the sergered seam.
Take a tapestry needle and slide it into the sergered seam.

Take the serger tail and slide it through the needle eye.

Pull the needle out of the seam, which pulls the serger tail through the seam as well.

Cut off excess tail.

Sleeve time! Turn up the bottom of the sleeve towards wrong side by 1/2"
Like this perfect hem guide? You can print it for free on the always fabulous Scientific Seamstress.

Sew hem with the zig zag stitch as described at the beginning of the tutorial OR use a double needle to hem. If using a double needle you will need to sew the hem from the RIGHT side of the fabric. Double needles magically create a loopy loop on the underside of the fabric. We want the loopy loop on the wrong side, so sew with right side up. Feel with your fingers as you sew to make sure you are catching both layers of fabric.
After hemming the sleeve, fold the sleeve right sides together. Sew or serge the sleeve. Repeat for other sleeve.

Turn sleeve right side out. Mark or place a pin marking the top center. Do the same for the other sleeve.

With the main body wrong side out, open up the sleeve hole. With sleeve right side out, place sleeve into main body right sides will be touching.
With the main body wrong side out, open up the sleeve hole. With sleeve right side out, place sleeve into main body right sides will be touching.

Pin sleeve to main body lining up raw edges.
Make sure to double check the pin or mark on the sleeve is matching with the shoulder seam and the bottom sleeve seam is matching with the back panel/side panel seam.

Pin around well.

Different angle. Sew or serge together. Repeat for other sleeve.

Hem your entire cardigan.
Three ways to do this.
1. Fold under 1/4" then another 1/4" around entire cardi-including the front panels, neck all the way around the bottom hem. Stitch with same zig zag or double needle.
2. Fold under 1/2" and zig zag or use double needle to hem.
3. Knit won't fray, so you don't have to hem.

Put it on, never take it off, admire, show off!


No comments:
Post a Comment