Day 2 ladies!
We will work on all the prep stuff which includes the handles, exterior zipper, making the pockets and basting the piping.
Do NOT be scared of the piping. I'm not sure why it seems intimidating.
It is the easiest way to add serious pizazz to your work.
Grab your interfaced handles. Ignore that my interfacing is short. sigh. It's not worth explaining.
It is the easiest way to add serious pizazz to your work.
Grab your interfaced handles. Ignore that my interfacing is short. sigh. It's not worth explaining.

Pin with right sides together, leaving one long straight side open for turning.
You can leave just a few inches open, but it makes turning the ends more difficult.
I left one entire straight side open to make my life easy.

It is extra helpful to draw your 1/2" SA around the corners and stitch following your lines.
You want the handle ends to be as symmetrical as possible. It will be very noticeable
if they are wonky.
Stitch around with 1/2" SA, leaving a straight edge open.

Trim your SA, turn, press-tucking your open edge in. Top stitch around entire handle.
Repeat for the other handle.

Yeppers.

Exterior Zipper Pocket.
Fold your exterior panel piece with the fleece rectangle in half to find the center.

Measure down 3.5" from the top along the center crease. Draw a line 9" long, centered.
*Also ignore the horrid fleece rectangle. I had another technical issue.*
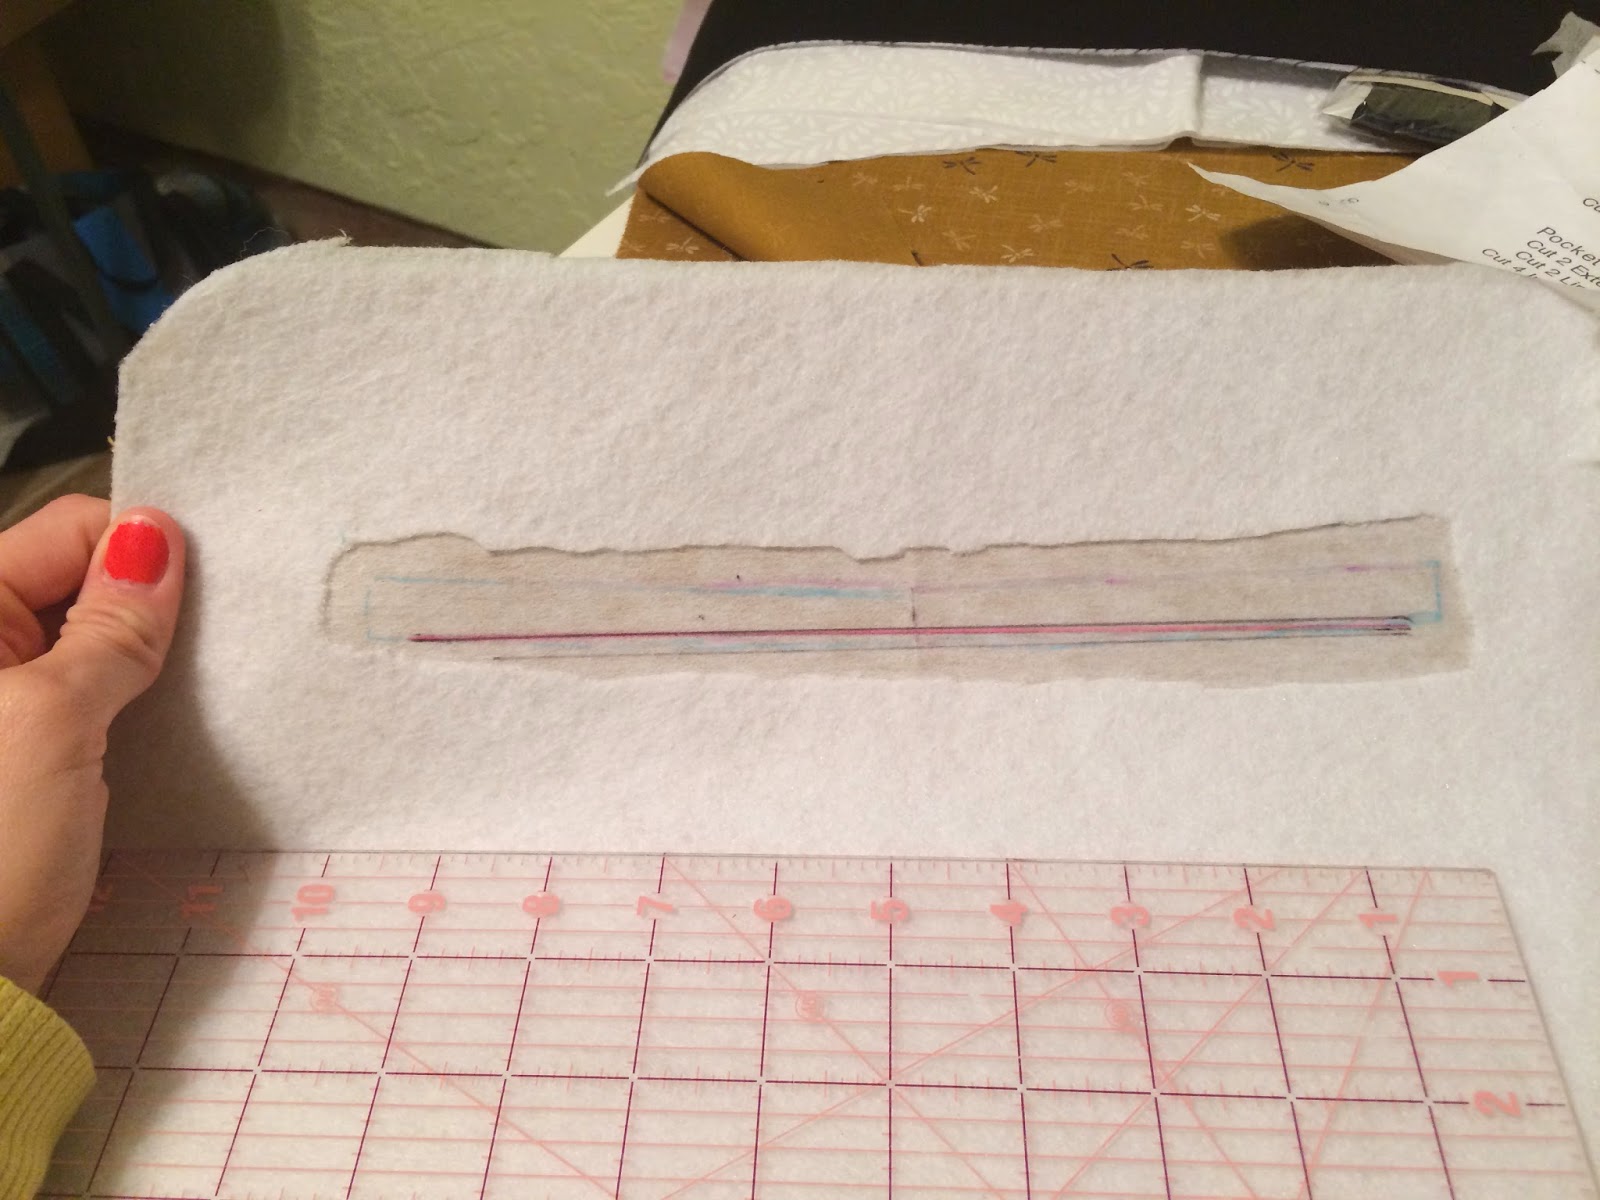
Draw another line 1/2" above the previous line and create a rectangle.
Rectangle should be 1/2" x 9".

Flip the panel over right side up. With right sides together, place one pocket piece (an 11" edge) 2.5" down from the top, which will be 1/2" above zipper box we drew on the wrong side. Pin close to top edge.

Flip it back over to the wrong side.
Draw a line down the middle of your rectangle.

Measure over 1/2' from each edge and draw diagonal lines to the corners as shown.


We will sew around the entire 1/2" rectangle.
Don't sew the middle line or the diagonal lines we drew.

Fold your panel in half and carefully snip the middle line at the fold.

Open the panel open, carefully cut down the middle line up to the triangle we drew on the ends.

Extra carefully, snip open the triangle. Cut as close to the stitches as possible.
But DON'T cut the stitches!
Do that for the other end.

Shove the pocket through to the wrong side.

Press well.

Grab the exterior 9" zipper. Position it in your beautiful rectangle on the wrong side. Pin in place.
Make sure the bottom, loose end of your pocket piece is pinned down out of the way.

Sew around the zipper 1/8" from the edge.

Press/steam.

Flip 'er over! Fold up the bottom of the pocket piece to meet the top edge of the pocket.

Pin the 3 raw edges of the pocket together.

Fold down the top of the main panel to pin the top of the pocket.

Sew along the pocket raw edges with 1/2" SA.
As you near the top of the pocket, move the main panel out of the way. We don't want to sew the main panel, only the pocket.

The bottom of the pocket should line up with the bottom of the main panel. We will sew the pocket down when we construct the bag.

Repeat all of these zipper instructions for the interior zipper pocket, starting 3" below the top of the interior main panel. The interior pocket does not have fleece, so you can skip those steps.
For now, pin the pocket up so it doesn't get sewn while we baste the piping.

We will be jumping around a little bit here. Have on hand:
Piping
Exterior main panels
1 Interior main panel
Both bottom panels
All pocket pieces
Seam Ripper
Take the main panel with the side zipper, piping, and your handy dandy seam ripper.
Piping can create a lot of bulk in your seam allowances,
so we are going to clip some of the cording out.
Our seam allowances are 1/2, we we will take out about that much.
Grab your ripper, measure over 1/2" and pop that stitch open.

Pull the fabric down, exposing the cording. Cut it out.

Fold the fabric back up in place.

Starting at the bottom center of the main panel, start pinning the piping down aligning raw edges, but leave 1/2" tail hanging off the bottom. We will overlap the piping ends here.
You want to slightly pull on the piping as you go to decrease the amount of slack that happens when you sew.
You want to slightly pull on the piping as you go to decrease the amount of slack that happens when you sew.

Pinned around.

How the overlapping ends should look.

Pop on the zipper foot.
Starting to the left of the overlap, sew as close to the cording as possible.
You want to start left so that if the piping shifts while you sew, you can adjust the ends.

Adjust the ends if necessary. Make sure the end on the bottom is pulled down and out of the way.
Sew straight across the ends. When you're done sewing check your ends.

See how I didn't catch the bottom end? I ripped the end off, pulled it down and re-sewed.

Professional!

Also apply piping to the following pieces:
1. Top of 1 exterior pocket piece
2. Top of 1 interior pocket piece
3. Both SHORT sides of of ext and int bottom pieces
Don't apply piping to other exterior main panel yet-we need to add the pocket first!
Remember to remove 1/2" of piping from each end to reduce seam bulk-especially important on the pockets!
To give you an idea of what to do.

Pockets
Grab all four pocket pieces.
Take your two exterior pocket pieces. Pin the tops right sides together.


Sew along the piping stitching.

Open it up.

Fold the back around and press well.

Top stitch 1/8" below the seam.

Lovely.

Take your non-zippered exterior main panel. Pin the pocket along the bottom.
I sewed piping on first, then realized my mistake. Palm ---> Face.
Don't do that.

Baste the pocket to the main panel at 1/4" SA.

Fold the panel in half, finding the center.

Starting at the bottom, sew up your crease to the top of the pocket.

Now you have two pockets!

Sew the piping on!
Repeat pocket instructions for interior pocket piece minus the piping around the main panel.
For the interior pocket, you only want piping at the top of the pocket.

Tomorrow is a short, easy day. Promise!
No comments:
Post a Comment