As promised, to day is easy and fast.
We will sew the handles on the exterior main panel and construct the main zipper.
Handles
Take an exterior main panel and one handle piece.
Position the handle ends 2" from the side and
the bottom of the handle end 2.25" from the top.
Pin in place.
Make sure your handle isn't twisted.

Top stitch around the edges of the handle ends.

When sewing along the top, be sure to not stitch over the piping.
You want to be 1/4" or so from the cording.

After you've sewn around, let's sew an 'X" to provide more strength.
Position your main panel to sew diagonally to one end.
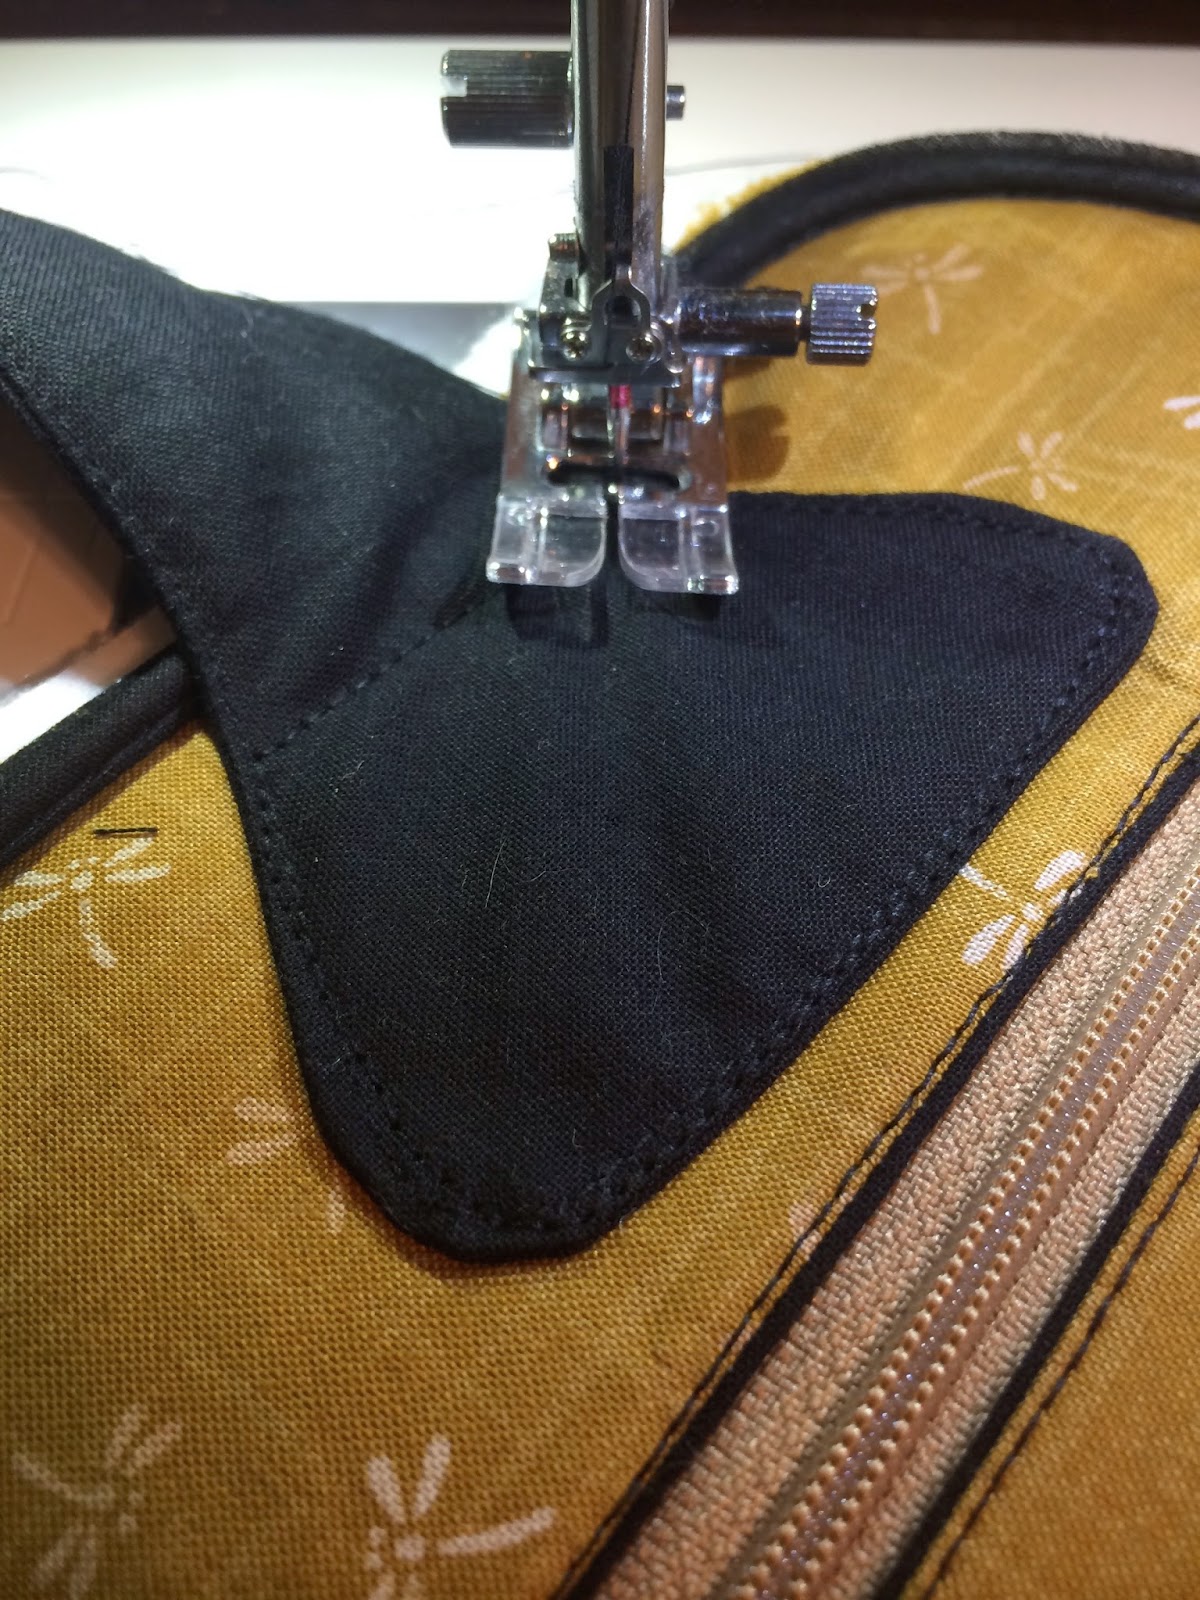
Once you get to the end, sew across the bottom of the handle end to the other corner.

At the other end, position your needle to sew another diagonal line back up to the top.


Repeat for the other handle ends.

Main Zipper
For this step, you need your 24" zipper (or 22" is okay) and
all 4 main zipper top pieces.
We will be constructing the bag differently than the original Dorothy instructions.
I would suggest reading through these directions and the directions in the pattern before continuing.
Pick which way you would like to do it.
Some people may think my way is more difficult, but I greatly like the results of this construction method.
Fold the zipper in half and mark the center on the wrong side.

Fold each top panel in half, mark the center on the wrong side of one long side.

Right sides together, match up the center marks of your zipper and one top panel.

We will ONLY sew from zipper stop to zipper stop.
Top stop.

Bottom stop.

Unzip your zipper a bit and put on your zipper foot (I'm using all purpose foot).
Sew 1/4" away from the edge.
*Remember only sew zipper stop to zipper stop!!!*
When you reach your zipper pull, stop sewing, needle down, move the pull back to the top and continue sewing the remainder of the zipper.

Right sides together, pin one interior top panel to exterior/zipper piece.
Your zipper is sandwiched in between the two pieces. Right side of zipper is towards the right side of the main top piece.

Following your previous stitching, sew all together.

It should look as such.

Press the top panels wrong sides together.

Follow the same instructions for the other side of the zipper.

Maneuver your top panels so the exterior panels are together and interior are together.

Move the interior pieces and the zipper ends out of the way, so we are only working with the
exterior pieces.

1/4" seam allowance, sew from the edge of the panel to meet with your zipper stitching.
Don't over lap the two stitching lines; stop and back stitch perfectly to meet.

Yep. Double check the other side of the panels and open it up
to make sure everything looks good.

Repeat for the lining side, making sure the exterior pieces and zipper ends are pulled away.
It should look like this.

Double check again. You should have this.

Repeat for the other end of the zipper panel. Put on a pretty zipper charm.

That's all today!
Tomorrow is the last day! You're almost done!
No comments:
Post a Comment