Welcome to day 3 of the Swoon Betty Sewalong!
Today, we will be completing the exterior main panels.
This includes the handles, stripes and piping. Yes, piping. Put those big girl panties back on.
I want to see everyone have piping. You can do it, trust me.
For today, you will need exterior main panels, all 4 stripes, handle pieces, handle hardware (if using), and piping.
Large Stripe
1. Take all 4 stripe pieces. Fold in half, matching long sides (hot dog style) and press.
Then fold each long side under 1/2". Press.
Repeat for other 3 stripes.

2. Fold a main panel in half to find the vertical center.
*Your exterior pocket needs to be pinned out of the way!*
Take one large stripe and match vertical crease on a main panel center.
I used wool and it did not want to crease for me, so I lined up my pattern piece to find the center.
(some of the pictures are at angles to prevent horrid shadows, sorry.)
(some of the pictures are at angles to prevent horrid shadows, sorry.)

3. Top stitch down each each side of large stripe.
(Is your pocket pinned out of the way?)
If you have a walking foot, it will be handy when sewing the stripes on.
If not, pin well and go slow to prevent your stripe from shifting down while you sew.

You want sew in the same direction on both sides of the stripe.
This way, if the stripe does shift down while you are sewing, both sides move down, rather than one up and one down.
This picture shows how I roll up the panel to sew other side in the same direction.

Handles
*Double check your pocket is still pinned out of the way!*
a. If you are NOT using handle hardware, measure up 9" from each raw handle edge.
Mark distance with your fav pen, I used chalk. (See first pic below.)
Pin one handle piece on one main panel. Middle of handle piece should line up with the large stripe edges (see second picture below or page 5/picture 11 in Betty instructions.)
Starting at the bottom of the panel, sew up (following your top stitching line) to your 9 inch mark, sew across handle and then down the other side of the handle and down to the bottom again.
Go back up to the 9" mark and stitch another horizontal row 1/4" below your first. (4th picture down.)
Working with the same handle piece, lay it down on the other side of the large stripe (of the same main panel piece) and repeat the instructions above. Be careful to not twist the handle piece!
Repeat all of the instructions for the second main panel piece.
If you need a visual of a completed main panel, scroll down 8-9 pictures.
b. If you are using handle hardware, take one of your 4 11" handle pieces. Slide a loop on one end. Fold raw edge of handle piece over 1/2" and then fold over again 1". The loop will be inside these folds. See page 5, Picture 11 in Swoon Betty Instructions for visual.
Pin handle piece on main panel. Middle of handle piece will land on edge of large stripe.
Sew along top stitching until you are 1" away from the loop. Sew across the handle piece and down the other side, still following your top stitching line (3rd picture below.)
Return to the horizontal stitching by the loop and sew another row 1/4" below for reinforcement (4th picture below.)
Repeat these instructions for the other side of the large stripe (same main panel piece).
Take one Handle B and slide it through a loop. Fold Handle B raw edge under 1/2" and again 1" (fold towards main panel piece). Stitch two rows to secure the handle.
Take the other end of Handle B and repeat above instructions for the other loop on same main panel piece. Careful to not twist the handle.
Repeat all of the above instructions to sew handles on the other main panel.
If you need a visual of the completed main panel, see the 10th picture below.
(I feel explaining the handle construction was difficult. PLEASE let me know if you are confused and I will assist you in any way possible.)
Pic 1

Pic 2. Sewing from the bottom up to 9" mark or to the loop.

Pic 3. Sewing across and then down other side of handle piece.

Pic 4. Sewing additional horizontal strength line 1/4" below original.

Small Stripe
1. Match center creases of small stripe with large stripe. Pin small stripe in place.
Sew along small stripe edge that is closest to your zipper. *Pocket is still pinned out of the way!*

2. Flip your panel over to the wrong side. Unpin your pocket and pull it across the back of the main panel. As we sew the other side of the small stripe, we will sew through the bottom of the pocket.
Pin the very edge of the pocket down. As you can see, I pinned the top and bottom right on the edge so I don't hit the pins as I sew.
I don't particularly enjoy having broken needles flying at my eyeballs. It's happened before.
I don't particularly enjoy having broken needles flying at my eyeballs. It's happened before.
3. Flip your main panel back over to the right side and sew down the other edge of the small panel.
Double check the wrong side that you caught the pocket and remove the pins.
Repeat for other main panel.
Double check the wrong side that you caught the pocket and remove the pins.
Repeat for other main panel.

Bella! (pic 8)

This is what your main panels should look like. Next we will apply the piping around the main panels. For this, I pin the handles down so they don't get in the way.
(Pic 9)
(Pic 9)

Piping Main Panels
1. With your piping still on the roll, open one end and cut out 1" of cording.
As before, this reduces the bulk in the seam allowance.

2. Starting at the BOTTOM MIDDLE of your main panel pin the end of the piping, leaving a tail hanging off.

3. Pin piping around entire main panel piece matching raw edges. Slightly pull on the piping as you go. When you get to the end, notice where the two ends meet. Open the second end of the piping and cut out that amount of cording. Be sure to leave a tail-about 1".

4. Pin the ends so the tail hangs off and out of the seam allowance. But also be sure there is sufficient overlap in the ends to make it pretty.

5. We want to start below the point where the piping meets. This way, if there is slack when we finish basting the piping, we can easily adjust.
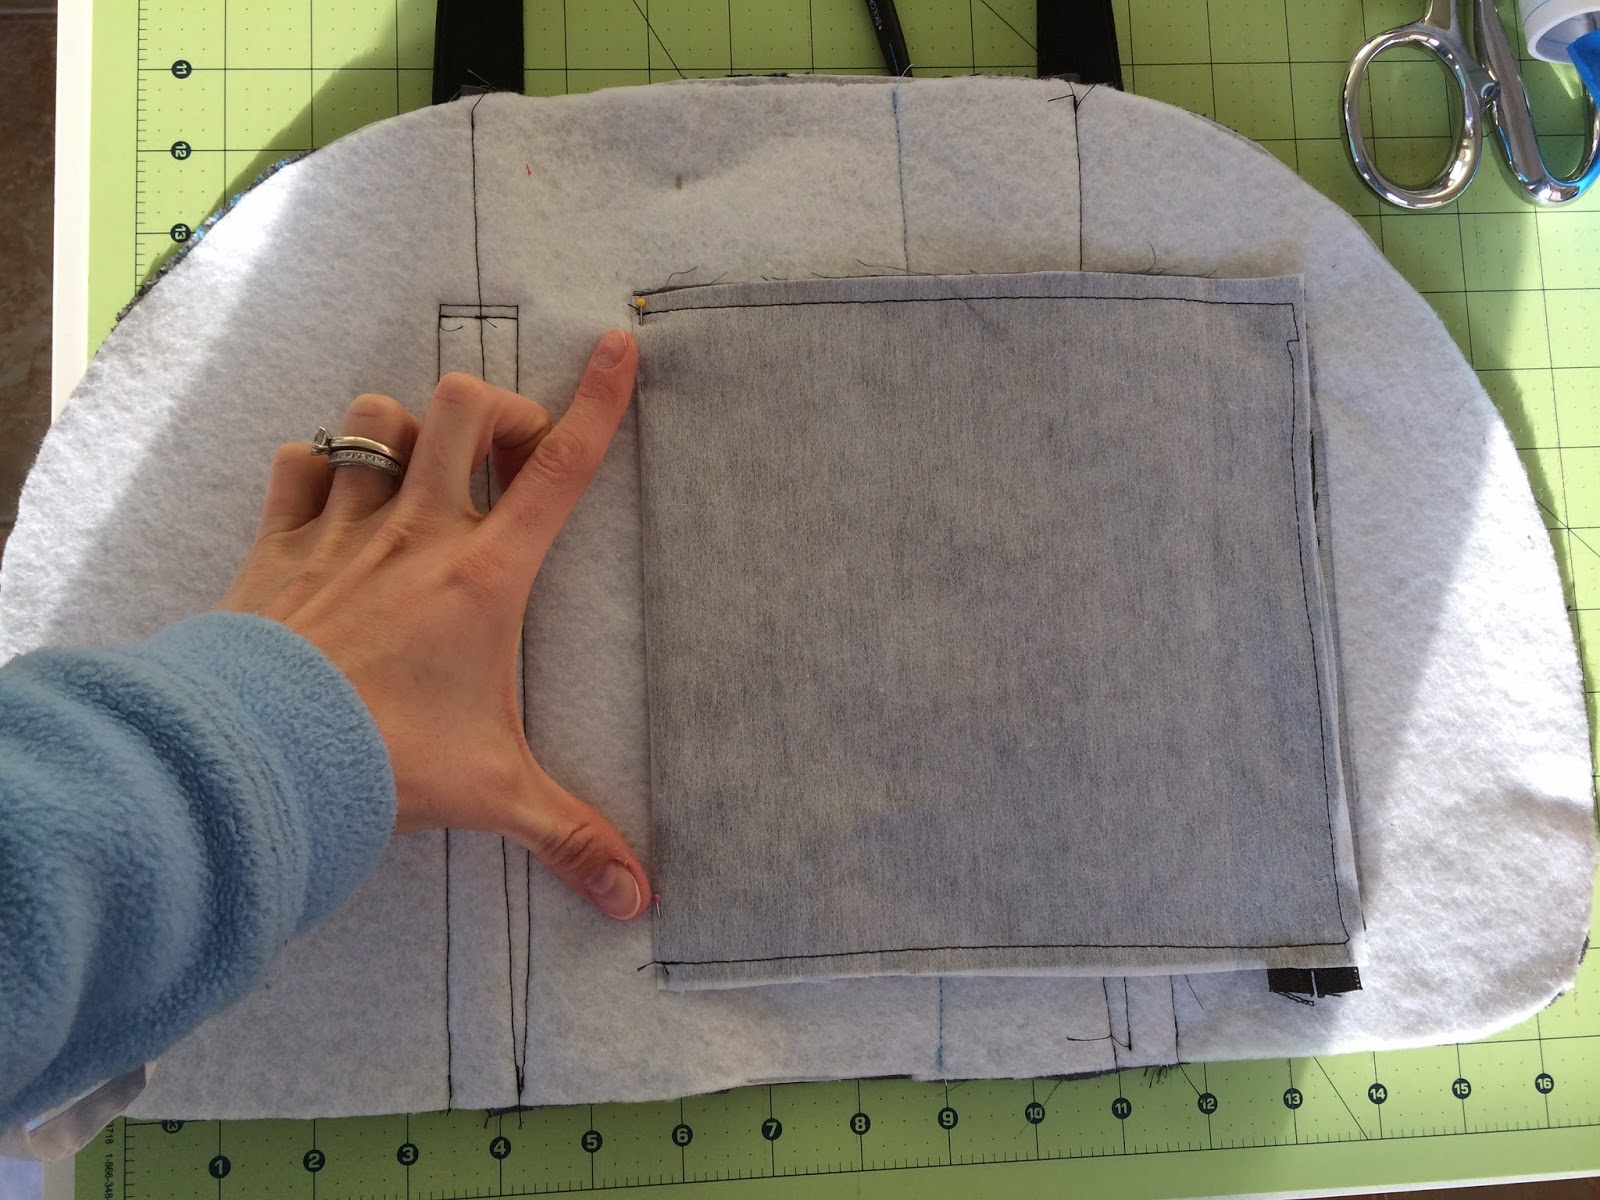
Start basing the piping to the main panel were my finger indicates. Follow as close to the stitching on the piping as possible. You can use your zipper or piping foot. I choose to use my all purpose foot.

6. When you sew around and get to the end, overlap the two ends of the piping, but pull the tails down and out of the way. Also, this is the time to adjust the top piping tail if you had any slack in the piping during basting. (that's a lot of 'ing's).
Tip: in the small areas we removed the cording, it's very easy for it to get sucked down into the seam allowance. Take an extra moment to make sure the piping is visible at the bottom and your overlap the two ends well.
PS. Piping without cording is called flat piping.
*This is why I remove some the cording. If you did not remove the cording, you would be sewing through many layers, making this area very bulky, especially for tomorrow when we sew the bag together.*

Voila!
7. Repeat for other main panel.

8. On the top bottom curves of the main panels, give the piping 1/8" snips (3 or 4 clips along the curve).
This helps the piping curve nicely along with the main panel. Don't cut deeper than 1/8"! We need the space to sew the side/bottom panel on!

This concludes day 3 of the Swoon Betty sewalong!
Tomorrow we will insert the zipper and construct the exterior and interior.
As always, please contact me if you have any questions, suggestions, or comments.
Or visit the Facebook Swoon Fan page.
Or visit the Facebook Swoon Fan page.
See you tomorrow!
No comments:
Post a Comment