Hello! I'm so happy you returned for day two of the Swoon Betty SAL!
This can mean one of two things 1) the SAL instructions are so awesome you came back for more
or 2) the SAL instructions are a train wreck that you can't help but stare at.
Either way, we must continue.
I like to get a bit of prep work out of the way. I find if I do a few things early, it makes the bag construction flow smoothly.
Making Handles
Step 1: Take your handle pieces and fold them in half, press.
Step 1: Take your handle pieces and fold them in half, press.
This applies to all handle pieces no matter which style you chose.

Step 2: Open handle and fold each raw edge to center folded crease. Press.

You'll have this.

Step 3: Fold handle pieces in half again (using original fold). Press.

Step 4: Pin (or clip) the 'open' side of the handles. Or don't pin if you like to live dangerously.

Step 5: Top stitch down both sides of all handle pieces.
I like to top stitch down the 'open" side first.
Set all handle pieces aside for safe keeping.

Making Interior Pocket
Step 1: Take one interior pocket piece and piping.
If you do not want to use piping on the interior pocket, skip down the step 12.
However, I HIGHLY recommend doing the piping. Why?
a) it's fun
b) it's easy
c) put on your big girl panties and just do it
1. Cut a piece of piping just slightly longer than the top of the pocket panel.

2. Starting on one side, line up raw edges of one of the pocket panels and the piping.
Have the piping slightly (1/8") hang off side of pocket panel as pictures below.

3. In order to reduce bulk at the seam allowance, we want to remove some of cording in the piping.
Measure, or eye ball, 5/8" from the edge of the piping. Rip that seam in the piping.

4. Open the piping to the 5/8" mark and cut the cording.

5. Fold it all back together and pin in place. Now when you sew you pocket on and your lining together, you don't have the bulk of the cord. Makes for a much nicer seam.

6. Piping is made on the bias and therefore stretchy. When sewing, the piping will produce slack and can get wobbly. I, personally, like to prevent this. While pinning the remainder of the piping to the top of the panel, slightly pull on the piping.

Picture after pinning.

7.Cut off the extra piping, leaving 1/8" beyond the edge of the pocket panel.

8. Measure 5/8" from the edge of piping and cut out the cording like we did earlier.
(Ignore the piping hang over; I swapped the previous step and this one while making my bag.)

9. Throw on your zipper foot (or piping foot if you're lucky to have one).
Sew as close to the piping stitching as possible.
For legal purposes, I must ask you to NOT put your fingers this close to the needle while sewing.
Sew as close to the piping stitching as possible.
For legal purposes, I must ask you to NOT put your fingers this close to the needle while sewing.

Easy, right? Yes it is.

10. Grab the other interior pocket panel and lay it on top, right sides together. Pin.

11. Following the stitches you made from sewing the piping on. Sew along top of panels only.


12. Open up panels and admire your handy work.

13. Fold wrong sides together and give it a good pressing.

14. Top stitch 1/8" away from piping.

15. Take one interior main panel and place the pocket on top matching bottom and sides. Pin.

16. Baste pocket in place at 1/4" seam allowance. Only sew from piping to piping.


17. Now lets turn this big pocket into two.
Fold panel in half and give a quick press with your fingers to find the middle.

18. Starting at the bottom of your panel, sew a line following your crease.
Only sew to the piping.
*If you sew the pocket from piping to bottom, the pocket could shift down as you sew creating bunching at the bottom. Sewing from bottom to top (piping) prevents this problem.*

Set the pocket aside.
Exterior Zipper Pocket
1. Remember that itty bitty rectangle we cut out yesterday? Yea, the one that crawled its way into the trash can. Yep, locate that piece.
Also grab the exterior main panel piece that has the fleece rectangle cut out of it. I'll give you a moment to search through all your pieces.
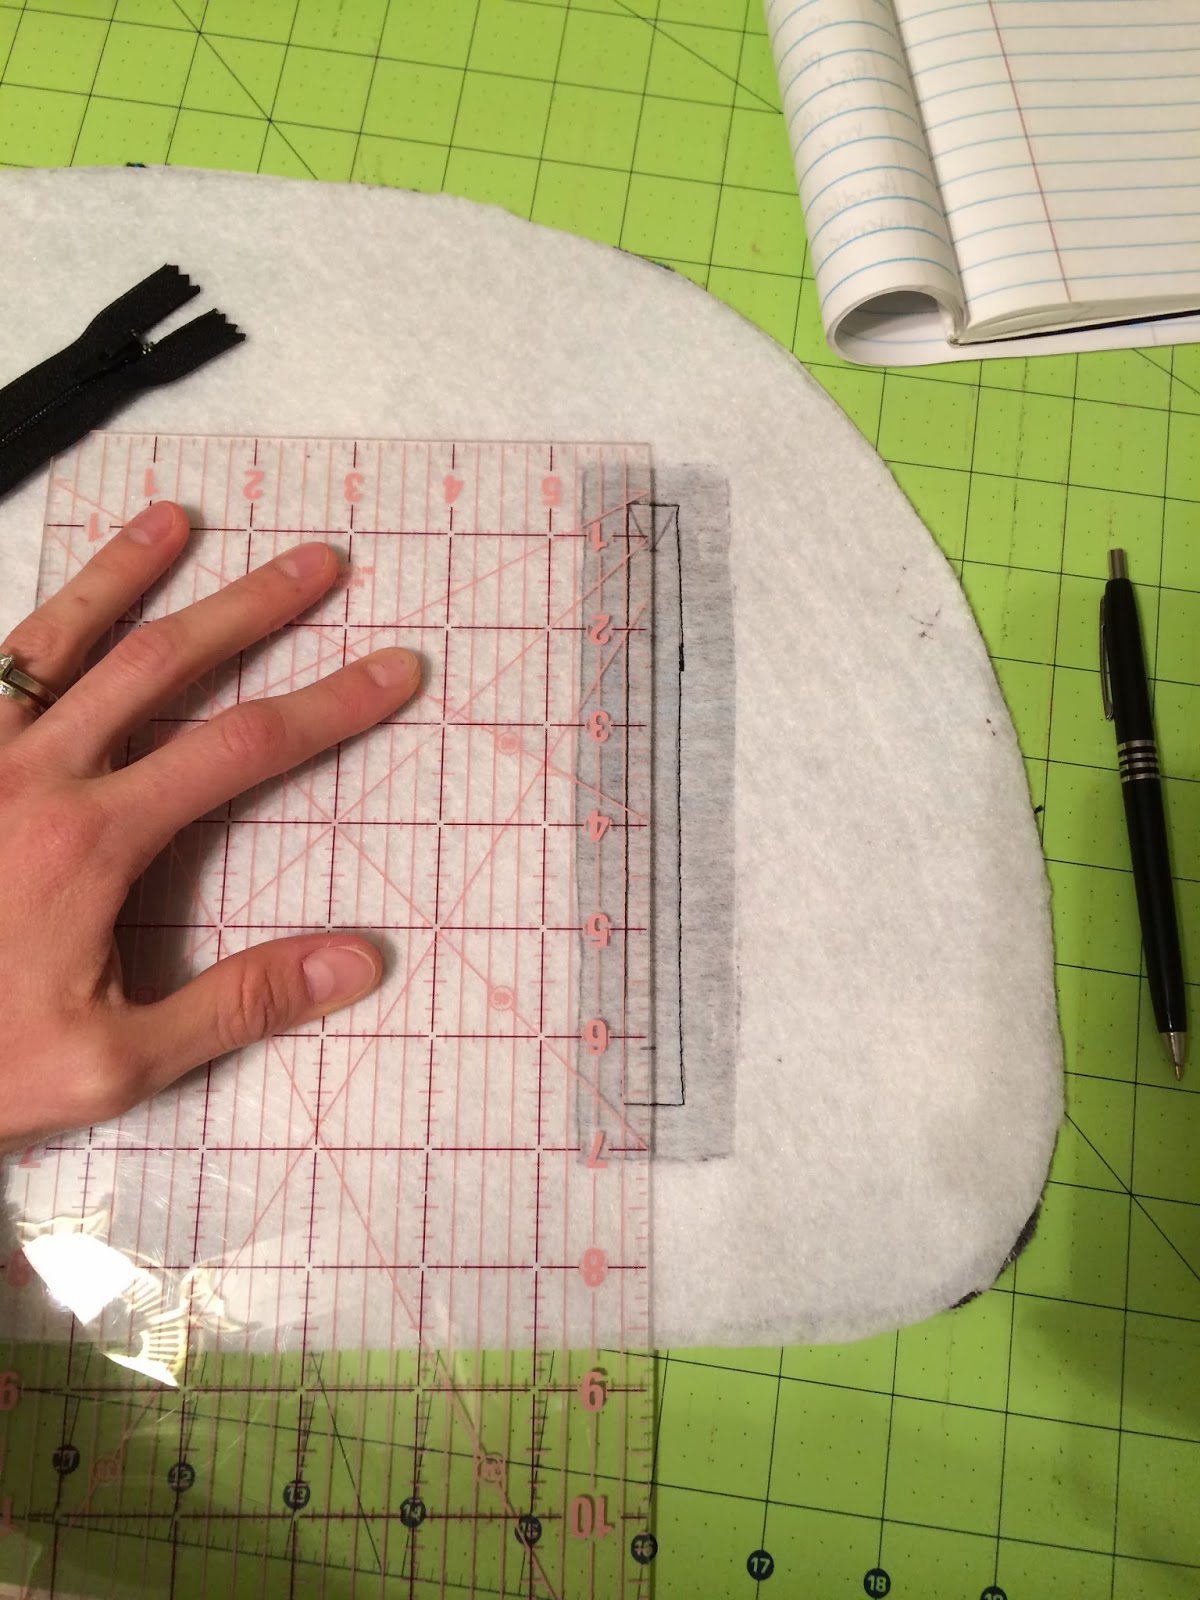
With the fleece side up, put the rectangle patten piece in the middle of your fleece hole. You can use a ruler to make sure it's perfectly vertical. Draw around your pattern piece.

It should look like this.

2. Now take your exterior pocket piece. With right sides together, line up one edge of pocket piece 1/2" past the rectangle you drew-which just so happens to be the end of the fleece hole you cut.
I drew a pretend zipper rectangle here for your visual pleasure!
I drew a pretend zipper rectangle here for your visual pleasure!

This picture shows the wrong side flipped up to compare the pocket edge to the zipper rectangle.
Honestly, I'm not sure the reason for this picture. Hopefully it will help someone.

3 . Pin that puppy in place- VERY close to the edges of the pocket.
Also place a pin farther down the zipper pocket piece to make sure it doesn't get caught up in the sewing.

4. Flip your panel piece back to the wrong side where you drew the zipper rectangle.
Sew along those lines.

Should look like this.

5. We will now draw our zipper lines.
Draw another line straight down the middle of your zipper rectangle.
6. Mark 1/2" up from the top and from the bottom of your zipper rectangle box.

7. Draw diagonal lines from the 1/2" mark to each corner of the zipper rectangle.

We will carefully cut out along the dark lines.

8. Very carefully snip along your line. Cut up to the 'V' and stop as shown below.
Do NOT cut past the V to the top of the zipper rectangle!

9. Carefully snip the 'V"


10. Repeat for the bottom half.

11. Flip the panel to the right side and shove the pocket piece through the zipper hole.

12. Give it a REALLY good pressing.

13. Take your short zipper. I like to sew the top ends of the zipper together.
Doing so keeps them from folding over and shifting when sewing the zipper to the panel.

14. Place the zipper on the wrong side of the panel and pin in place.
Using a washable glue stick on the wrong side of the panel can also be helpful to keep the the zipper in place.

15. Using your zipper foot, carefully edgestich around the rectangle at 1/8".

16. Unpin your pocket piece from the panel. Fold it on it self matching the short raw edges.

17. Pin together. Careful to only pin the pocket piece and NOT pin the main panel.

18. The short ends can be tricky. Pull it away from the main panel and pin.

19. Sew around the 3 raw edges at 1/2" seam allowance. Go slow on this step and move your main panel out of the way. Be especially careful while sewing the short end by the zipper.

Oh yes, fantastic!

20. Pull your pocket up and away from the main panel. Pin.

This is where we stop today.
Tomorrow we will sew on the handles and stripes to the main panels of the bag!
I would love feedback! Is the sewalong too wordy? Want more details? More/less pictures?
Please tell me! I would like to make you happy!
No comments:
Post a Comment